













So, you’re looking for an outdoor waterproof wall light, but the sheer number of options has left you scratching your head. No worries, we’ve all been there. The “best” light isn’t a one-size-fits-all answer; it truly depends on your specific needs, the look you’re going for, and the kind of weather it’ll face. This guide will walk you through the practical considerations so you can confidently pick the right one for your home. We’ll cover everything from durability to design, helping you cut through the marketing jargon and get straight to what matters.
Understanding Waterproof Ratings and Durability
When we talk about outdoor lights, “waterproof” is a pretty big deal. But it’s not just a simple on/off switch; there’s a spectrum of protection. This is where IP ratings come in, and understanding them is crucial for ensuring your light can stand up to the elements it will encounter.
Deciphering IP Ratings (Ingress Protection)
IP ratings might look like technical jargon, but they’re actually quite straightforward once you know the code. An IP rating always consists of two digits.
The First Digit: Solid Particle Protection
This digit tells you how well the light is protected against solid objects like dust, dirt, and even tiny bugs.
- 0: No protection.
- 1: Protected against solid objects over 50mm (e.g., accidental touch by hand).
- 2: Protected against solid objects over 12.5mm (e.g., fingers).
- 3: Protected against solid objects over 2.5mm (e.g., tools, thick wires).
- 4: Protected against solid objects over 1mm (e.g., most wires, screws).
- 5: Dust protected (ingress of dust is not entirely prevented, but it must not interfere with the satisfactory operation of the equipment).
- 6: Dust tight (no ingress of dust).
For outdoor lights, you generally want something with at least a 4 or 5 here, to prevent common debris from getting in and causing issues. A 6 is ideal, especially in dusty areas.
The Second Digit: Liquid Ingress Protection
This is the one that really speaks to “waterproof.” It indicates how well the light resists water.
- 0: No protection.
- 1: Protected against vertically falling drops of water.
- 2: Protected against vertically falling drops of water when tilted up to 15 degrees.
- 3: Protected against spraying water (up to 60 degrees from vertical).
- 4: Protected against splashing water from any direction.
- 5: Protected against water jets from any direction.
- 6: Protected against powerful water jets from any direction.
- 7: Protected against immersion in water up to 1 meter for 30 minutes.
- 8: Protected against continuous immersion in water under conditions specified by the manufacturer (usually deeper and longer than IPX7).
For an outdoor wall light, you’ll typically want an IP rating of at least IPX4 to handle splashes and light rain. If your light will be exposed to heavy downpours, direct hose spray, or in a very exposed location, IPX5 or IPX6 offers much better peace of mind. Lights exposed to sea spray or intense weather conditions would benefit most from IPX6. Anything higher than 6 (like 7 or 8) is usually overkill for a wall-mounted fixture unless it’s specifically designed for submersed use, which is rare for wall lights.
Materials Matter: Longevity in the Elements
Beyond the IP rating, the materials used in the light’s construction play a huge role in its long-term durability. Different materials react differently to moisture, UV rays, temperature fluctuations, and even salt spray if you live near the coast.
Metal Housings
- Aluminum: A popular choice due to its light weight, corrosion resistance (especially powder-coated or anodized aluminum), and good heat dissipation. It’s a solid all-rounder. Ensure it’s treated for outdoor use, as raw aluminum can still oxidize.
- Stainless Steel: Offers excellent corrosion resistance, particularly grades 304 and 316. 316 is often called “marine grade” because of its superior resistance to salt spray, making it ideal for coastal areas. Stainless steel is more expensive and heavier than aluminum but very durable. Be aware that even stainless steel can develop “tea staining” (surface rust) if not maintained or if exposed to harsh conditions, so look for quality finishes.
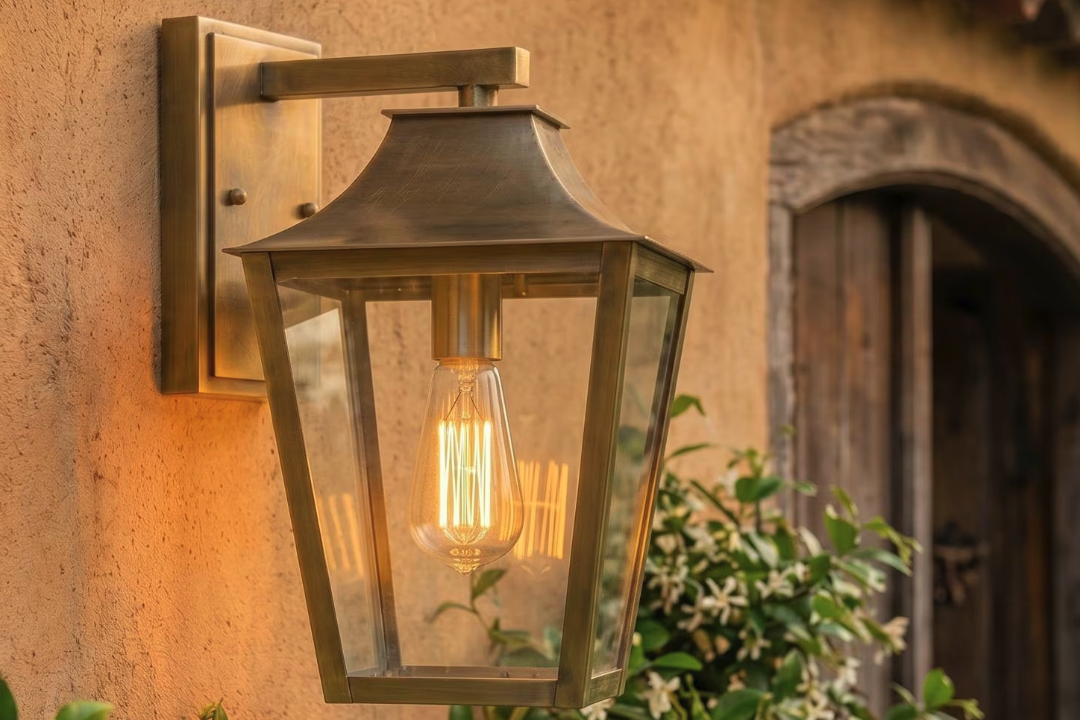
- Brass/Copper: These metals develop a beautiful patina over time, which can be a desirable aesthetic. They are naturally highly resistant to corrosion and salt. They are also usually more expensive but can last for decades. They do change color, so make sure you like the weathered look.
- Die-Cast Zinc: Often used for more ornate or heavier-duty fixtures. It’s strong and can be highly resistant to corrosion when properly finished (e.g., powder-coated).
Non-Metallic Housings
- Polycarbonate/High-Grade Plastics: Modern plastics have come a long way. High-quality polycarbonate is very durable, resistant to impact, UV degradation, and corrosion. It’s lightweight and often more affordable. However, cheaper plastics can become brittle and discolored over time. Look for UV-stabilized versions.
- Glass: Used for lenses and diffusers. Tempered glass is stronger and safer than standard glass. It’s important that the seals around the glass are robust and well-designed to prevent water ingress.
When evaluating materials, consider your local climate. If you live somewhere with high humidity, heavy rain, or near the ocean, investing in materials like marine-grade stainless steel or brass/copper will save you headaches (and replacement costs) down the line.
Deciding on Light Output and Functionality
Once you’re confident in the light’s ability to withstand the weather, it’s time to think about what it actually does. How much light do you need? What kind of light? And what features will make your life easier or safer?
Lumens and Brightness: How Much is Enough?
Forget watts; lumens are your true measure of brightness. Watts just tell you how much energy the light consumes, not how much light it produces.
- Ambient Lighting: For general pathways, entryways, or just creating a gentle glow, you might need something in the 200-500 lumen range per fixture. This is enough to see where you’re going without being overly harsh.
- Task Lighting/Security: If you need to illuminate a specific area for tasks (like grilling) or for security purposes, you’ll want higher lumens, perhaps 500-1000+ lumens per fixture, depending on the area size. Multiple lights can achieve this too.
- Accent Lighting: Sometimes, you just want to highlight an architectural feature or landscaping. These lights can be quite low, even 50-200 lumens, focusing more on direction and beam spread than overall brightness.
Consider the “wash” of light – does it need to spread wide, or be directed narrowly? Some fixtures have adjustable heads or louvers to control the beam.
Color Temperature: Setting the Mood
Color temperature, measured in Kelvin (K), dictates the “warmth” or “coolness” of the light. This significantly impacts the ambiance.
- Warm White (2700K – 3000K): Similar to traditional incandescent bulbs, this creates a cozy, inviting, and relaxing atmosphere. Great for patio areas, dining spaces, or front entries where you want a welcoming feel.
- Neutral White (3500K – 4000K): A balanced light that’s often described as clean and crisp. Good for general illumination where you need to see colors accurately, like near a barbecue, or for a more contemporary look.
- Cool White/Daylight (5000K – 6500K): Brighter, more stimulating light. Often used for security lighting, garages, or areas where maximum visibility is paramount. It can feel a bit stark for purely aesthetic applications.
Think about the primary function of the light and the existing color scheme of your home’s exterior. Consistency in color temperature across multiple outdoor lights usually looks best.
Smart Features and Controls
Modern outdoor lighting isn’t just about flicking a switch. There are numerous features that can add convenience, energy efficiency, and security.
Motion Sensors (PIR – Passive Infrared)
- How they work: Detect movement by sensing changes in infrared radiation (body heat).
- Benefits: Excellent for security (sudden light can deter intruders), energy saving (only on when needed), and convenience (hands-free illumination when arriving home).
- Considerations: Look for adjustable sensitivity and duration settings. Some can be triggered by animals, so placement is key.
Dusk-to-Dawn Sensors (Photocells)
- How they work: Automatically turn the light on when it gets dark and off when it gets light.
- Benefits: Set-it-and-forget-it operation, continuous ambient lighting through the night, energy efficient compared to leaving lights on 24/7.
- Considerations: Ensure the sensor isn’t obstructed or fooled by other light sources (e.g., streetlights).
Smart Home Integration
- How they work: Connect to your home Wi-Fi network or smart hub, allowing control via smartphone apps, voice assistants (Alexa, Google Assistant), or programmed schedules.
- Benefits: Ultimate flexibility in scheduling, dimming, color changing (if RGBW), and integration with other smart devices.
- Considerations: Requires a reliable Wi-Fi connection. Some systems are proprietary, so check compatibility with your existing smart home setup.
Timers
- How they work: Basic built-in timers allow you to set the light to turn on and off at specific times.
- Benefits: Simple scheduling without the need for smart home complexity.
- Considerations: Less flexible than smart systems but perfectly adequate for many needs.
Placement and Installation Considerations
Where you put the light and how it gets installed are just as important as the light itself. Good planning here avoids headaches later.
Determining Optimal Mounting Height
The height at which you mount your outdoor wall light significantly impacts its effectiveness and aesthetic appeal.
- Entryways: For lights flanking a door, a common guideline is to mount the bottom of the fixture about 60-66 inches (152-168 cm) from the ground. This generally places the light source slightly above eye level for most adults, preventing glare while providing good illumination for the doorway and steps. If you have a very tall door or ceiling, you might go slightly higher to maintain proportion.
- General Wall Lighting (Patios, Decks): For broader illumination along a wall, consider mounting lights evenly spaced, perhaps 6-8 feet apart, at a height that complements the architectural features. Around 7-8 feet high (213-244 cm) can spread light effectively across a wider area without being intrusive.
- Security Lighting: Motion-sensor lights for security are often mounted higher, perhaps 8-10 feet (244-305 cm), to maximize their detection range and spread a wider beam of light. Ensure they’re directed away from neighbors’ windows.
- Avoiding Glare: A crucial point is to ensure the light source isn’t directly in your line of sight when you’re walking up to it. If the light fixture has a strong downward component, it can be mounted higher. If it casts light primarily outwards, slightly lower may be better to avoid blinding visitors.
Consider the scale of your home and the size of the fixture. A small light on a large wall will look lost, and vice-versa.
Wiring and Power Requirements
Most outdoor wall lights are hardwired, meaning they connect directly to your home’s electrical system.
Hardwired vs. Solar
- Hardwired:
- Pros: Reliable, consistent power, brighter output, no battery limitations.
- Cons: Requires electrical wiring, potentially a more complex installation (often needing an electrician), fixed location.
- Considerations: Ensure your existing wiring can handle the load, or plan for new wiring if needed. Always turn off power at the breaker before working with electrical connections.
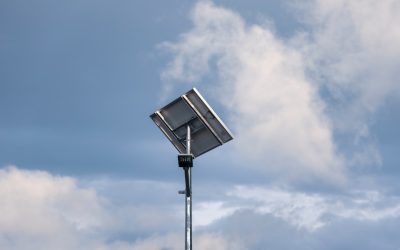
- Solar Powered:
- Pros: Easy installation (no wiring needed), zero electricity cost, environmentally friendly.
- Cons: Brightness often lower, dependent on sunlight (performance degrades on cloudy days or in shaded areas), battery lifespan limitations, less reliable for consistent, strong illumination.
- Considerations: Best for accent lighting or areas where strong, consistent light isn’t critical. Placement of the solar panel is crucial – it needs direct sunlight for several hours a day.
Voltage
Most residential outdoor lights are designed for standard line voltage (120V in North America, 230-240V in Europe/UK). Ensure the light you choose matches your local electrical standards. Low-voltage (12V) systems are common for landscape lighting, but less so for wall-mounted fixtures unless they are part of a larger low-voltage system.
Electrical Codes and Safety
This is not a step to skip. Adhering to electrical codes is vital for safety.
- Local Codes: Always check your local electrical codes and regulations. These often dictate requirements for outdoor wiring, conduit, junction boxes, and GFCI (Ground Fault Circuit Interrupter) protection.
- GFCI Outlets/Breakers: Any outdoor electrical circuit should ideally be protected by a GFCI. This rapidly cuts power if it detects a ground fault, preventing severe electric shocks. Many outdoor receptacles are required to be GFCI-protected.
- Junction Boxes: Outdoor light fixtures must be mounted to a weather-rated outdoor junction box. These boxes are designed to be watertight and protect the wire connections from moisture.
- Professional Installation: If you’re not comfortable or experienced with electrical work, it’s always best to hire a licensed electrician. Incorrect wiring can be a serious fire and shock hazard.
Aesthetic Appeal: Style and Design
While functionality is key, let’s be honest, you also want your outdoor lights to look good. They should complement your home’s architecture and exterior design.
Matching Architectural Styles
Think of your outdoor lights as an extension of your home’s personality.
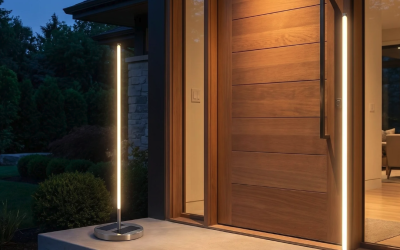
- Modern/Contemporary: Look for clean lines, geometric shapes, minimalist designs. Materials like brushed aluminum, stainless steel, and sleek black or white finishes are common. Up/down lights (sconces that cast light both upwards and downwards) are very popular in this style.
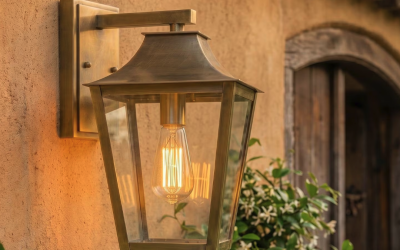
- Traditional/Colonial/Farmhouse: Often feature classic lantern shapes, perhaps with seeded glass or a wrought-iron look. Finishes like oil-rubbed bronze, black, or even copper can fit well. Details like intricate scrollwork or clear panels are common.
- Craftsman/Mission: Emphasizes simple, sturdy lines, often with a square or rectangular frame. Materials like bronze or copper, sometimes with frosted or amber-colored glass panels, are characteristic. The focus is on quality and hand-crafted appearance.
- Industrial: Exposed elements, metal cages, rugged finishes (like galvanized steel or dark bronze). Often uses a more utilitarian look.
- Coastal: Durable materials like marine-grade stainless steel, solid brass, or corrosion-resistant composites are paramount. Designs can vary but often lean towards classic lantern styles or simple, robust fixtures that can withstand salty air.
Take a step back and look at your home from the street. What era is it? What are its defining features? Your lighting should enhance these elements, not clash with them.
Size and Scale: Proportionality is Key
The size of your light fixture relative to your wall, door, or the overall scale of your home is critical.
- Entryway Lights: A good rule of thumb for lights flanking a front door is that they should be roughly 1/4 to 1/3 the height of the door. If you only have one light, consider a slightly larger one, perhaps 1/3 to 1/2 the door’s height, placed on the lock side. This ensures the light doesn’t look puny next to a grand entrance or overwhelmingly large next to a modest one.
- Wall Length: For broader wall spaces, consider the area you’re illuminating. A small light on a large, blank wall will look lost. Multiple smaller lights, spaced appropriately, or one larger statement piece, might be more suitable.
- Overhangs/Eaves: If mounting under an overhang or eave, ensure the light size doesn’t feel cramped or out of place.
Hold up a piece of cardboard cut to the dimensions of the light fixture you’re considering. This can give you a much better visual idea of its scale in its intended spot.
Finish and Color Coordination
The finish of your outdoor light should either blend seamlessly or provide a thoughtful contrast with your home’s existing exterior elements.
- Match Existing Hardware: Look at your door handles, house numbers, and other exterior hardware. Do they have a consistent finish (e.g., brushed nickel, oil-rubbed bronze, black)? Matching this can create a cohesive look.
- Complement Trim/Paint: Consider your exterior paint color, window trim, and roofing. A black fixture often looks crisp against lighter siding, while a bronze finish can complement earthy tones.
- Material Aesthetics: As discussed earlier, metals like brass and copper will patina over time. Decide if you like this natural aging process or prefer a finish that maintains its original appearance (e.g., powder-coated aluminum).
- Glass Type: Clear glass provides maximum light output and sparkle, but can show dust and bugs. Seeded glass adds texture and a traditional feel. Frosted or etched glass diffuses light more softly, reducing glare and often giving a more contemporary look.
Don’t be afraid to mix materials subtly, but try to keep the overall aesthetic consistent. For instance, if you have a modern home, mixing a sleek black fixture with a warm wood element on your door can work well, but pairing it with an overly ornate, traditional light fixture might feel disjointed.
Budget and Value
Finally, let’s talk about money. Investing in a good outdoor light is worthwhile, but you don’t need to break the bank. It’s about finding the right balance between cost, quality, and features.
Understanding Price Ranges and What They Offer
Outdoor waterproof wall lights come in a wide range of prices, from very inexpensive to quite high-end.
- Entry-Level (Under $50): These lights typically feature basic designs, often made from thinner aluminum or lower-grade plastics. They might have an IP rating of IPX3 or IPX4, which is okay for very sheltered locations. The finishes might not be as durable, and components like sensors might be less reliable or precise. They are good for a quick, temporary fix or for areas where aesthetics and long-term durability aren’t top priorities.
- Mid-Range ($50 – $150): This is where you’ll find the sweet spot for many homeowners. Lights in this range often use good quality aluminum (often powder-coated), decent polycarbonate, or even some lighter-gauge stainless steel. They usually offer IPX4 to IPX5 ratings, making them suitable for most outdoor conditions. You’ll find a wider variety of styles, more reliable sensors, and better overall craftsmanship. Many excellent LED integrated fixtures fall into this category, offering good brightness and energy efficiency.
- Premium ($150 – $400+): At this level, you’re looking at lights constructed from marine-grade stainless steel (316L), solid brass, copper, or heavy-duty die-cast aluminum with exceptional finishes. IP ratings will often be IPX5 or IPX6, sometimes even IPX7 for specific applications. These lights are built to last for decades, even in harsh environments like coastal areas. They often feature sophisticated designs, high-quality integrated LEDs with excellent color rendering, advanced smart features, and longer warranties. You’re paying for superior materials, construction, and often better light performance and longevity.
Remember, the initial cost isn’t the only cost. Factor in energy consumption (LEDs are much cheaper to run), bulb replacement costs (if applicable), and the lifespan of the fixture. A cheaper light that needs replacing every few years might end up costing more than a more expensive, durable one.
The Value of Energy Efficiency (LEDs)
In today’s market, choosing anything but LED for outdoor lighting is generally a false economy.
- Long Lifespan: LEDs last significantly longer than traditional incandescent or even CFL bulbs, often tens of thousands of hours. This means less frequent bulb changes, especially for hard-to-reach outdoor fixtures.
- Lower Energy Consumption: LEDs use a fraction of the electricity to produce the same amount of light (lumens). This translates directly into lower electricity bills.
- Durability: LEDs are solid-state devices, meaning they don’t have delicate filaments or glass envelopes that can break. This makes them more resistant to vibrations and impact, which is a bonus for outdoor use.
- Instant On and Directional Light: LEDs turn on instantly to full brightness and can be very directional, which is ideal for targeted lighting.
- Integrated vs. Replaceable Bulbs: Many modern outdoor LED lights have integrated LED modules. While this means you can’t just screw in a new bulb, the module itself is designed to last for the life of the fixture. If you prefer the option to replace bulbs, look for fixtures that accept standard LED bulbs (E26/E27 bases).
While LED fixtures might have a higher upfront cost, their long-term savings in energy and maintenance almost always make them the more economical and environmentally friendly choice.
Warranty and Customer Support
Don’t overlook the warranty and the reputation of the manufacturer.
- Warranty Length: A good warranty is a sign that the manufacturer stands behind their product. For outdoor lights, look for warranties of at least 1-3 years, with some premium brands offering 5 years or more, especially for integrated LED components.
- What’s Covered: Understand what the warranty covers (e.g., manufacturing defects, finish degradation, LED driver failure).
- Brand Reputation: Do a quick search for reviews of the brand. Are customers generally satisfied? Is their customer service responsive if issues arise? A reliable company can make all the difference if you encounter problems down the road.
Choosing a light from a reputable manufacturer, even if it costs a bit more, can save you a lot of hassle and potential replacement costs in the long run.
By carefully considering these aspects – durability, functionality, placement, aesthetics, and budget – you’ll be well-equipped to select an outdoor waterproof wall light that not only looks great but also performs reliably for years to come, truly enhancing your outdoor space.